Showing posts with label template. Show all posts

Thursday, September 27, 2012

Card Making Basics - The Blank Card

I love to make seasonal cards.  And this year, I will be sharing them with you.  Before I do, I would like to show you how I make blank cards.  They are quite easy to make, and will save a lot of repetition and space if I tell you here and now.  I make a size called A1, which is a party invitation style.  I use this size because if you unfold an A1 card, it is exactly half the size of a 8.5 x 11 inch piece of paper.  Also, blank envelopes can be purchased in groups of 100 at most stores that sell office stationery.  But, they are also easily made out of paper.  But this blog post will focus on making the cards, not the envelopes.  So here we go.

A few years ago I bought a bunch of 8.5 x 11 inch cardstock at a Hobby Lobby sale, and spent a lost weekend cutting them in half.  I left the unfolded and filled this box with the results of that weekend.  As you can see, I have barely put a dent in my store of pre-cut cards.

Cards 00
This is what obsession may look like.
 You can buy cheap cardstock for these card blanks at Wal-Mart, where you can get a pack of 50 sheets for $5.00.  This means 100 cards for $5.00.  They sell Colorbok cardstock.  It is a white centered cardstock.

Cards 01
Yes, it's cheap.  But it shows that it is cheap.
 There are two flaws I see with this cardstock.  One is the way they package it.  They hold the pieces together by adding a little extra cardstock and perforate the edges, so you can tear them out.  This leaves a jagged white edge on one side of the cardstock.  However, this can be overcome by a little ink on the edges if you want to go this way.  I bought a package just to use on this year’s cards to prove that to you.

Cards 02
Leaving a jagged edge on my paper isjust.. it's just wrong!
 The other flaw is their color.  White cardstock is white cardstock.  It looks like bleach.  Colors, however, seem to be washed out.  The first picture below are two different cardstocks of a dark red.  The bottom paper is Bazzill, the top is Colorbok.  In comparison, the Colorbok paper looks brown.  The second picture is black.  This time, the bottom is Colorbok and the top is Bazzill.  The Bazzill paper is much deeper.  And this picture shows a third flaw.  Even with clean hands, every time I handled the black paper, I left finger prints.  Fortunately, I know how to remove those prints.  I will tell you how in another blog.

Cards 03
Hmm... one of these is definitely NOT red.

Cards 05
Yes, they are both black.  But one can be used for forensics.


Okay.  Now I take a piece of paper and put it on the cutter, as below.  I cut the paper in half, which means setting it at 5.5 inches.


Cards 06
Make sure your edge is even against the cutter...

Cards 07
... and that your paper is indeed 11 inches tall...

Cards 08
...and you will end up with two 5.5 inch pieces
    
This gives you two pieces of paper. These are basically your card blanks.  Unfolded, of course.

Cards 09
This is how I store them.  You can fold them first with a bone folder if you prefer.
 This is the unfolded card.  You can also cut the paper in half the other way, which makes a taller card. For that, you cut at the 4.25 inches.

Cards 10
Make sure it's straight as before...

Cards 11
...and if your paper is indeed 8.5 inches long...

Cards 12
... you will have two 4.25 inch pieces...

Cards 13
... just like these.  Nice huh?
 Here is the differences in size.  I use the taller cards like an A-frame, with the fold at the top.  But you can use the cards in whatever direction you want to.  Most of the time, I cut my cards the first way.

Cards 14
They are the same size, but a fold makes ALL the difference.
 Of course, if you make cards this dark, you might want some paper on the inside that you can stamp or write on.  For this, I usually use plain white cardstock.  Basically, you use the inside of the card as a matte, and cut the “picture” (aka the white paper) to fit inside it.  Start by cutting the paper in half again, either way.
Cards 15
Here we go again... do I really need to tell you to keep it straight?
Then cut the paper in half the other way.  This gives you four equal pieces.
Cards 16
Don't be tempted to double up.  They like to slip apart, making them uneven
To make it fit within the inside of the card, cut 1/4 inch off of two perpendicular sides.  Most cutters give you a handy guide just below the cutting line.  Line your paper up at the first line below the line, that I am pointing at here.
Cards 17
That's not nail fungus. I got happy with glitter glue.
This makes one side 4 inches, and the other 5 1/4 inches.
Cards 18
I guess I show you these shots...
Cards 19
... for visual confirmation.  Or filler...
This size fits both my regular cut card and the A-frame cut cards.
Cards 21
My regular cut is like a pair of "relaxed cut" jeans.
Cards 22
The a-frame cut is like "boot cut" jeans.  It's all about preference really.
And that is pretty much it.  I cut a ton of these and they last me quite a while.  Halloween cards will be made with these awesome black cards this year.  And as soon as I figure out what I am going to do, I will totally share that with you.

Sunday, September 9, 2012

Scrapbooking with a Template, Take One

For those of us who want the time to enjoy scrapbooking as well as making something interesting, there are a plethora of helpers out there.  They are called templates, and they can be found in blogs, magazines, magazine websites, and even your fellow scrapbookers have probably doodled lots of them.  I know I have.  I buy magazines every so often and like to read them, and then cut out everything I like and add it to a box.  They come in handy when I have scrapper’s block, or when I want to make something intricate but don’t have the time or inclination to think of what to do.
Today, I made a two-page spread for the honeymoon scrapbook I am working on using a template.  Yes, it was a blank page for someone else to put their pictures in.  But that doesn’t mean you cannot do this for yourself.  Why not make blank pages for yourself, so that if something awesome comes along, you already have pages ready to put them into to wow your family and friends.  It is faster, in my opinion, to make blank pages than to make ones for pictures you have had sitting around for ages.  But don’t worry, I have ways to make those pages go faster as well.  Anyway, let us continue.
Here is the template.  It was cut from a magazine, but honestly I could not tell you which one, because I cut this out well before I decided to make a blog.  It looks cool, and not too difficult (in my opinion).  The best thing about this template, and what makes it fairly easy, is that dimensions are written on there for everything I have to cut.  After that, picking out the papers to use is the fun part.  I only used paper, a paper cutter, and a little ink for cut edges for this page.
2012-09-01_11-22-58_373
As you can see, I decided to move away from the greens and browns of the scrapbook so far and use a bright, delicious orange for the background.  This is going to be a page about food and taking a break, so I thought it would be appropriate.
2012-09-01_12-16-02_122
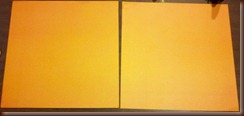
When I am making blank pages, I work from back to front.  I start with the base paper, then the background paper(s), any large decorations, journaling, photo mats, and embellishments.  I know this sounds like “duh, how else would you do it?”  Well, normally I pick pictures that I want to see together, matte them, then figure out what should go behind them to make up the page.  So I pretty much am going to go backwards for me here.  After laying out the base papers, I cut out and tape down the background paper.  There are two large rectangles in this template that make up the background.  I cut the large piece of paper behind the picture mats.  It looks like it is supposed to be a single piece, but I used an 8.5 x 11 piece of paper, which wasn’t big enough.  So, I used two coordinating pieces of paper.  I think it looks kind of funky.
2012-09-01_12-18-44_833
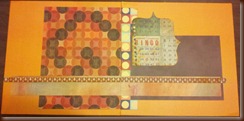
The second back paper I decided to make a potato brown.  For the large, interesting shape, I freehanded a previously used piece of Ranger Distress paper.  It had a kooky bingo pattern on it that I like, but can never find a use for.  One of the best things about abstract shapes used for filler is that they don’t specifically have to match the theme.  Their only job is to look good.  And possibly provide a nice space for journaling if need be.  Which I think this will likely be.
2012-09-01_12-20-37_87
Next came the long pieces of paper across the bottom of the page.  Now, it looked to me like these could oh so easily be have been ribbon, or fabric or anything I wanted it to be.  For me, I saw this as a perfect way to use up those extra bits of paper I always get when I trim down background paper.  So I went into my scrap paper stash and found two pieces that matched the color scheme and were close enough to the right sizes for the page.  Note that I said close enough.  Like I say, templates and measurements – at least on this blog – are guidelines, not rules set in stone.  Besides, they look sweet.
2012-09-01_12-28-45_993
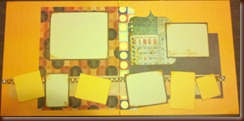
Remember that potato brown paper I cut for one of the background papers?  I cut as many mattes as I could from the leftover for about four of the picture sizes listed on the template.  I put off white cardstock on those mattes, inked around the edges with walnut Ranger Distress Ink.  For the rest of the photo mattes I used a lighter orange cardstock than that of the main background.  Still sweet.
2012-09-01_12-33-14_81
Last but not least, I added
2012-09-01_12-57-44_496